Nützliche Kommandozeilen-Einzeiler für LaTeX
Unter https://gist.github.com/iwishiwasaneagle/2f91f63f3cb0107b94b501aa284a18ca gibt es eine Sammlung an nützlichen Einzeilern für die Arbeit mit LaTeX.
Textsatz mit \LaTeX, Programmieren, Zahlen, etc.
Archive for the ‘LaTeX’ Category.
Unter https://gist.github.com/iwishiwasaneagle/2f91f63f3cb0107b94b501aa284a18ca gibt es eine Sammlung an nützlichen Einzeilern für die Arbeit mit LaTeX.
Hier ein einfaches Beispiel, wie man mit Python und LaTeX ein PDF mit Kursinformationen erstellen kann.
Zuerst der Python-Teil, der die Apple-Kursdaten seit dem 1.1.2021 in einen Dataframe lädt und dann in eine LaTeX-Tabelle schreibt:
import pandas import pandas_datareader.data as web YAHOO_TODAY="http://download.finance.yahoo.com/d/quotes.csv?s=%s&f=sd1ohgl1vl1" history = web.DataReader('AAPL', "yahoo", start="2021-1-1") history.to_latex('aapl.tex') |
Dann noch der LaTeX-Teil, der a) den Python-Code aus dem LaTeX-Lauf heraus ausführt und b) die erzeugte Tabellen-Datei nur dann einbindet, wenn sie wirklich auch erzeugt wurde.
\documentclass[12pt,ngerman]{scrartcl} \usepackage[a4paper, top=1cm,bottom=1cm,left=1cm, right=1cm]{geometry} \usepackage[T1]{fontenc} \usepackage{booktabs} \makeatletter \newcommand{\testfileexists}[1]{% \IfFileExists{#1}% {\def\inputtestedfile{\@@input #1 }} {\let\inputtestedfile\@empty}% } \makeatother \begin{document} \write18{python runpy.py} \testfileexists{aapl} \inputtestedfile \end{document} |
Hier einige Beispiele für farbige Boxen mit dem tcolorbox Paket, entnommen der Paketbeschreibung
\documentclass[12pt,ngerman]{scrartcl} \usepackage[utf8]{inputenc} \usepackage[T1]{fontenc} \usepackage{booktabs} \usepackage{babel} \usepackage{graphicx} \usepackage{csquotes} \usepackage{paralist} \usepackage{xcolor} \usepackage{blindtext} \usepackage{microtype} \usepackage{empheq} \usepackage[most]{tcolorbox} \tcbuselibrary{theorems} \newtcbtheorem[number within=section]{mytheo}{My Theorem}% {colback=green!5,colframe=green!35!black,fonttitle=\bfseries}{th} \begin{document} \begin{tcolorbox} Hallo Welt! \end{tcolorbox} \begin{tcolorbox} \blindtext \end{tcolorbox} \begin{tcolorbox}[colback=red!5!white,colframe=red!75!black,title=My nice heading] This is another \textbf{tcolorbox}. \tcblower Here, you see the lower part of the box. \end{tcolorbox} 
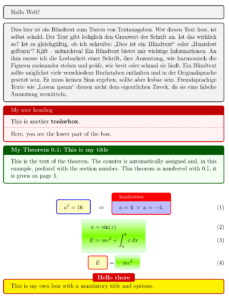
\begin{mytheo}{This is my title}{theoexample} This is the text of the theorem. The counter is automatically assigned and, in this example, prefixed with the section number. This theorem is numbered with \ref{th:theoexample}, it is given on page~\pageref{th:theoexample}. \end{mytheo} \begin{equation} \tcbset{fonttitle=\footnotesize} \tcboxmath[colback=yellow!25!white,colframe=blue]{ a^2 = 16 } \quad \Rightarrow \quad \tcboxmath[colback=blue!25!white,colframe=red,title=Implication]% { a = 4 ~\vee~ a=-4. } \end{equation} \newtcbox{\otherbox}[1][]{nobeforeafter,math upper,tcbox raise base, enhanced,frame hidden,boxrule=0pt,interior style={top color=green!10!white, bottom color=green!10!white,middle color=green!50!yellow}, fuzzy halo=1pt with green,#1} \begin{empheq}[box=\otherbox]{align} a&=\sin(z)\\ E&=mc^2 + \int_a^b x\, dx \end{empheq} \begin{equation} \tcbhighmath{E} = \otherbox{mc^2} \end{equation} \newtcolorbox{mybox}[2][]{colback=red!5!white, colframe=red!75!black,fonttitle=\bfseries, colbacktitle=red!85!black,enhanced, attach boxed title to top center={yshift=-2mm}, title=#2,#1} \begin{mybox}[colback=yellow]{Hello there} This is my own box with a mandatory title and options. \end{mybox} \begin{tcolorbox}[enhanced, size=minimal,auto outer arc, width=2.1cm,octogon arc, colback=red,colframe=white,colupper=white, fontupper=\fontsize{6mm}{6mm}\selectfont\bfseries\sffamily, halign=center,valign=center, square,arc is angular, borderline={0.2mm}{-1mm}{red} ] STOP \end{tcolorbox} \begin{tcolorbox}[enhanced, size=minimal,auto outer arc, width=2.1cm,octogon arc, colback=green,colframe=white,colupper=black, fontupper=\fontsize{6mm}{6mm}\selectfont\bfseries\sffamily, halign=center,valign=center, square,arc is angular, borderline={0.2mm}{-1mm}{green}] GO \end{tcolorbox} \end{document} |
Das pgfornaments Paket erlaubt es, spezielle Schmuckzeichen für beispielsweise Kurszertifikate zu nutzen. Hier ein Beispiel, das ich gern für die Teilnehmerinnen und Teilnehmer meiner LaTeX-Kurse nutze.
\documentclass[16pt,ngerman]{scrartcl} \usepackage[utf8]{inputenc} \usepackage[T1]{fontenc} \usepackage{booktabs} \usepackage{eso-pic,calc} \usepackage{babel} \usepackage{graphicx} \usepackage{csquotes} \usepackage{paralist} \usepackage{xcolor} \usepackage[a4paper,landscape,bottom=1.5cm]{geometry} % left=0pt,right=0pt,top=0pt,bottom=0pt \usepackage{palatino,dashrule} \usepackage{pgfornament} \pagestyle{empty} \setlength{\parindent}{0pt} \makeatletter \AddToShipoutPicture{% \begingroup \setlength{\@tempdima}{5mm}% \setlength{\@tempdimb}{\paperwidth-\@tempdima-3cm}% \setlength{\@tempdimc}{\paperheight-\@tempdima}% \put(\LenToUnit{\@tempdima},\LenToUnit{\@tempdimc}){% \pgfornament[color=magenta,anchor=north west,width=3cm]{63}} \put(\LenToUnit{\@tempdima},\LenToUnit{\@tempdima}){% \pgfornament[color=magenta,anchor=south west,width=3cm,symmetry=h]{63}} \put(\LenToUnit{\@tempdimb},\LenToUnit{\@tempdima+\paperheight-1cm}){% \pgfornament[color=magenta,anchor=north east,width=3cm,symmetry=v]{63}} \put(\LenToUnit{\@tempdimb},\LenToUnit{\@tempdima+\paperheight-21cm}){% \pgfornament[color=magenta,anchor=south east,width=3cm,symmetry=c]{63}} \endgroup } \let\strippt\strip@pt \makeatother \begin{document} \centering\Huge \textbf{Zertifikat} \vspace{20mm} \begin{center} Max Mustermann%\hdashrule[0.75ex]{14cm}{1pt}{3mm} \end{center} \vspace{1cm}\huge hat erfolgreich am zweitägigen \LaTeX-Kurs der Musteruni teilgenommen. \vspace{2cm}\LARGE\flushleft Musterau, \hfill\hdashrule[0.75ex]{9.5cm}{1pt}{2mm} \today \begin{center} \vfill\pgfornament[width=0.7\textwidth]{88} \end{center} \end{document} |
Um ansprechende Matrizen zu setzen gibt es mit dem nicematrix Paket ein recht neues Paket, das sich alle anschauen sollten, die viel mit Matrizen zu tun haben. Die folgenden Beispiele sind der Dokumentation entnommen, teilweise braucht man mehrere LaTeX-Läufe für das finale Ergebnis.
%!TEX TS-program = Arara % arara: pdflatex: {shell: yes} \documentclass[12pt,ngerman]{scrartcl} \usepackage[utf8]{inputenc} \usepackage[T1]{fontenc} \usepackage{babel} \usepackage{xcolor} \usepackage{tikz} \usepackage{siunitx} \usepackage{nicematrix} \NiceMatrixOptions{cell-space-top-limit = 1pt,cell-space-bottom-limit = 1pt} \begin{document} \begin{equation} \begin{pmatrix} \frac12 & -\frac12 \\ \frac13 & \frac14 \\ \end{pmatrix} = \begin{pNiceMatrix} \frac12 & -\frac12 \\ \frac13 & \frac14 \\ \end{pNiceMatrix} \end{equation} \begin{equation} A = \begin{pNiceMatrix}[baseline=2] \frac{1}{\sqrt{1+p^2}} & p & 1-p \\ 1 & 1 & 1 \\ 1 & p & 1+p \end{pNiceMatrix} \end{equation} \NiceMatrixOptions{cell-space-top-limit=1pt,cell-space-bottom-limit=1pt} \begin{equation} A=\begin{pNiceArray}{cc|cc}[baseline=line-3] \dfrac1A & \dfrac1B & 0 & 0 \\ \dfrac1C & \dfrac1D & 0 & 0 \\ \hline 0 & 0 & A & B \\ 0 & 0 & D & D \\ \end{pNiceArray} \end{equation} \begin{equation} \begin{NiceArray}{*{5}{c}}[hvlines] \diagbox{x}{y} & e & a & b & c \\ e & e & a & b & c \\ a & a & e & c & b \\ b & b & c & e & a \\ c & c & b & a & e \end{NiceArray} \end{equation} \NiceMatrixOptions{code-for-first-row = \color{red}, code-for-first-col = \color{blue}, code-for-last-row = \color{green}, code-for-last-col = \color{magenta}} \begin{equation} \begin{pNiceArray}{cc|cc}[first-row,last-row=5,first-col,last-col,nullify-dots] & C_1 & \Cdots & & C_4 & \\ L_1 & a_{11} & a_{12} & a_{13} & a_{14} & L_1 \\ \Vdots & a_{21} & a_{22} & a_{23} & a_{24} & \Vdots \\ \hline & a_{31} & a_{32} & a_{33} & a_{34} & \\ L_4 & a_{41} & a_{42} & a_{43} & a_{44} & L_4 \\ & C_1 & \Cdots & & C_4 & \end{pNiceArray} \end{equation} \begin{equation} \begin{pNiceArray}{ScWc{1cm}c}[nullify-dots,first-row] {C_1} & \Cdots & & C_n \\ 2.3 & 0 & \Cdots & 0 \\ 12.4 & \Vdots & & \Vdots \\ 1.45 \\ 7.2 & 0 & \Cdots & 0 \end{pNiceArray} \end{equation} \[\begin{NiceMatrix}[ code-before = { \tikz \draw [fill = red!15] (row-7-|col-4) -- (row-8-|col-4) -- (row-8-|col-5) -- (row-9-|col-5) -- (row-9-|col-6) |- cycle ; } ]1 \\ 1 & 1 \\ 1 & 2 & 1 \\ 1 & 3 & 3 & 1 \\ 1 & 4 & 6 & 4 & 1 \\ 1 & 5 & 10 & 10 & 5 & 1 \\ 1 & 6 & 15 & 20 & 15 & 6 & 1 \\ 1 & 7 & 21 & 35 & 35 & 21 & 7 & 1 \\ 1 & 8 & 28 & 56 & 70 & 56 & 28 & 8 & 1 \end{NiceMatrix}\] \( \begin{bNiceMatrix} C[a_1,a_1] & \Cdots & C[a_1,a_n] & \hspace*{20mm} & C[a_1,a_1^{(p)}] & \Cdots & C[a_1,a_n^{(p)}] \\ \Vdots & \Ddots & \Vdots & \Hdotsfor{1} & \Vdots & \Ddots & \Vdots \\ C[a_n,a_1] & \Cdots & C[a_n,a_n] & & C[a_n,a_1^{(p)}] & \Cdots & C[a_n,a_n^{(p)}] \\ \rule{0pt}{15mm} & \Vdotsfor{1} & & \Ddots & & \Vdotsfor{1} \\ C[a_1^{(p)},a_1] & \Cdots & C[a_1^{(p)},a_n] & & C[a_1^{(p)},a_1^{(p)}] & \Cdots & C[a_1^{(p)},a_n^{(p)}] \\ \Vdots & \Ddots & \Vdots & \Hdotsfor{1} & \Vdots & \Ddots & \Vdots \\ C[a_n^{(p)},a_1] & \Cdots & C[a_n^{(p)},a_n] & & C[a_n^{(p)},a_1^{(p)}] & \Cdots & C[a_n^{(p)},a_n^{(p)}] \end{bNiceMatrix} \) \end{document} |
Um mehreren nebeneinander gesetzten Bildern separate Bildunterschriften zu geben, war das subfigure Paket lange Standard. Mit dem subcaption Paket von Axel Sommerfeldt gibt es einen würdigen Nachfolger, der aktiv gepflegt wird.
Hier ein Beispiel, zum Übersetzen bitte eigene Bilder nutzen:
\documentclass[12pt,ngerman]{scrartcl} \usepackage[utf8]{inputenc} \usepackage[T1]{fontenc} \usepackage{babel} \usepackage{graphicx} \usepackage{subcaption} \begin{document} \begin{figure} \centering \subcaptionbox{Eine Katze \label{cat1}} {\includegraphics[width=0.49\textwidth]{Bilder/Katze1}} \subcaptionbox{Die selbe Katze \label{cat2}} {\includegraphics[width=0.49\textwidth]{Bilder/Katze2}} \caption{Zwei Katzenbilder}\label{katzenbilder} \end{figure} Abbildung \ref{cat1} auf Seite \pageref{katzenbilder} Abbildung \ref{cat2} auf Seite \pageref{katzenbilder} Abbildung \ref{katzenbilder} auf Seite \pageref{katzenbilder} \end{document} |
Um einen einfachen Flyer zu erstellen gibt es nichts besseres als die leaflet-Klasse. Hier ein einfaches Beispiel, die Katzenbilder muss man zum Übersetzen auskommentieren oder ersetzen.
\documentclass[12pt,ngerman]{leaflet} \usepackage[utf8]{inputenc} \usepackage[T1]{fontenc} \usepackage{booktabs} \usepackage{babel} \usepackage{graphicx} \usepackage{csquotes} \usepackage{paralist} \usepackage{xcolor} \usepackage{palatino} \usepackage{blindtext} \usepackage{microtype} \author{Uwe Ziegenhagen} \title{Mein erster Flyer} \begin{document} \maketitle \thispagestyle{empty} \section{Foo} \blindtext[2] \section{Bar} \includegraphics[width=\textwidth]{Bilder/Katze2} \blindtext \section{Hello} \blindtext[4] \section{World} \blindtext \section{Hallo Welt} \blindtext \includegraphics[width=\textwidth]{Bilder/Katze1} \end{document} |
Vor einiger Zeit fiel mir auf, dass TeXworks die PDF-Anzeige manchmal nicht aktualisiert. Wann genau dies aber geschah und wann nicht, konnte ich aber nicht feststellen. Gestern schließlich brachte eine Google-Suche nach „texworks not refreshing the pdf“ eine TSX-Frage [1] ans Licht, in der der Autor dieses Fehlverhalten untersucht hatte: Das PDF wurde immer dann nicht aktualisiert, wenn die entsprechende TeX-Datei im Wurzelverzeichnis eines Laufwerks lag. Muss man erst einmal drauf kommen…
Ein Bug-Request [2] war schnell geschrieben, in der neuesten Development-Version ist dieser Bug bereits gefixt.
[1] https://tex.stackexchange.com/questions/568368/texworks-pdf-not-refreshing
[2] https://github.com/TeXworks/texworks/issues/908
English Summary
In TeXworks (at least in version 0.6.5) the PDF is not updated after compilation if the TeX file had been placed in a top-level directory. A bug report was raised, it will be fixed in future versions.
Vermutlich ist es nicht so bekannt, dass man LaTeX-Pakete auch per REST-API auf CTAN hochladen kann. Das ist insbesondere dann praktisch, wenn man öfter Pakete aktualisieren muss, wie ich es beispielsweise mit der DTK Bibliografie mehrmals im Jahr mache.
Manfred Lotz vom CTAN-Team hat dazu ein Python-Skript geschrieben (https://gitlab.com/Lotz/pkgcheck/blob/master/ctan_upload.py), das diese API befüttert.
Ich habe sein Skript noch ein wenig angepasst (ich erstelle auch die ZIP-Datei damit und kopiere die richtigen Dateien an ihren Platz), mein Skript findet ihr im Github unter https://github.com/dante-ev/dtk-bibliography/blob/master/pack_and_upload_to_ctan.py. Für den Upload selbst benötigt man noch eine TOML-Datei, in der die Upload-Informationen als Key-Value-Paare stehen. Ein Beispiel für eine solche TOML-Datei findet ihr bei Manfred unter https://gitlab.com/Lotz/pkgcheck/-/blob/master/pkgcheck.toml.
Für Dante e.V. betreue ich einige E-Mail-Listen auf mailman-Basis, die seit einigen Tagen von Spammern geflutet werden. Jeden Tag sind dutzende bis hunderte Aufnahme-Requests in der Liste, die ich manuell wegwerfen müsste. Nachdem ich dies einmal händisch getan hatte, musste eine automatische Lösung gefunden werden.
Die Lösung bestand darin, einen Treiber für Firefox („geckodriver“) zu installieren, der das Fernsteuern des Browsers erlaubt. Dann kann mittels selenium Modul die Steuerung aus Python heraus erfolgen. Unten der wesentliche Quellcode als Basis für eigene Arbeiten, den Teil zum Erkennen von legitimen Anfragen habe ich weggelassen.
Nachtrag vom 25.10.2020: Siehe auch die Erweiterung unter https://www.uweziegenhagen.de/?p=4420
# -*- coding: utf-8 -*- """ https://www.edureka.co/community/47679/is-it-possible-to-run-headless-browser-using-python-selenium """ from selenium.webdriver import Firefox from selenium.webdriver.firefox.options import Options opts = Options() #opts.set_headless() # Ich will sehen, wie selenium arbeitet #assert opts.headless # Operating in headless mode browser = Firefox(executable_path=r"C:\Users\Uwe\Downloads\geckodriver-v0.27.0-win64\geckodriver.exe", options=opts) browser.implicitly_wait(3) # einloggen browser.get('<url des mailman admin panels') search_form = browser.find_element_by_name('<passwortfeld_ID>') search_form.send_keys('<adminpasswort>') search_form.submit() #wegwerfen Button pro Zeile fields = browser.find_elements_by_xpath("//input[@value='3']") #email Adresse des Spammers emails = browser.find_elements_by_xpath('//td[contains(text(),"@")]') if len(fields) == len(emails): zipped_list = list(zip(emails, fields)) for i in zipped_list: email, field = i field.click() |