Für ein spezielles Projekt habe ich eine Möglichkeit gesucht, eine Lose-Blatt-Sammlung mit LaTeX zu gestalten. Lose-Blatt-Sammlung heißt in dem Zusammenhang:
1) Für jede (logische) Seite existiert ein separates Unterdokument.
2) Im Dateinamen jedes Unterdokuments ist die Seitennummer enthalten.
3) Einzelne Seiten können dadurch problemlos ausgetauscht werden, ohne dass sich die Seitenzahlen der anderen Seiten ändern.
4) Jedes Unterdokument besteht grundsätzlich aus nur einer physischen Textseite, kann jedoch auch länger sein. Daher hat jedes Unterdokument eine Seitennummerierung der Form xx-yy. xx steht dabei für die logische Seitennummer im Hauptdokument, die aus dem Dateinamen gezogen wird, yy für die fortlaufende (physische) Seitennummer im Unterdokument selbst. Die fortlaufende Seitennummer für das Gesamtdokument werte ich nicht aus.
5) Alle Dokumente stehen natürlich unter Versionverwaltung, hier nutze ich Subversion.
Wie habe ich es umgesetzt?
Das Hauptdokument sieht wie folgt aus. Neben dem svn-multi Paket, das die Subversion-Daten bereitstellt, nutze ich varsfromjobname, um die einzelnen Komponenten der Dateinamen (xx-yy.tex) auswerten zu können. Die einzelnen Teile von Kopf- und Fußzeile werden durch scrlayer-scrpage modifiziert.
%!TEX TS-program = Arara
% arara: pdflatex: {shell: yes}
% arara: pdflatex: {shell: yes}

\documentclass[12pt,ngerman,headsepline,footsepline]{scrartcl}
\usepackage[utf8]{inputenc}
\usepackage[T1]{fontenc}
\usepackage{babel}
\usepackage{csquotes}
\usepackage{xcolor}
\usepackage{svn-multi}
\usepackage{currfile}
\usepackage{varsfromjobname}

\usepackage{blindtext}
\addtokomafont{pagenumber}{\textit}
\addtokomafont{sectionentrypagenumber}{\color{white}}
\usepackage[left=3cm,right=1.5cm,top=2cm,bottom=3cm]{geometry}

\usepackage[headsepline=0.25pt,footsepline=0.25pt]{scrlayer-scrpage}
\pagestyle{scrheadings}

\svnidlong{$HeadURL: svn://192.168.0.80/Dokumente/Uwe/Main.tex $}
{$LastChangedDate: 2020-07-16 10:42:03 +0200 (Do, 16 Jul 2020) $}
{$LastChangedRevision: 62 $}
{$LastChangedBy: uwe $}

\title{Main Document}
\author{Max Mustermann}

\begin{document}

\tableofcontents

\include{sub-01}
\include{sub-02}

\end{document} |
%!TEX TS-program = Arara
% arara: pdflatex: {shell: yes}
% arara: pdflatex: {shell: yes}
\documentclass[12pt,ngerman,headsepline,footsepline]{scrartcl}
\usepackage[utf8]{inputenc}
\usepackage[T1]{fontenc}
\usepackage{babel}
\usepackage{csquotes}
\usepackage{xcolor}
\usepackage{svn-multi}
\usepackage{currfile}
\usepackage{varsfromjobname}
\usepackage{blindtext}
\addtokomafont{pagenumber}{\textit}
\addtokomafont{sectionentrypagenumber}{\color{white}}
\usepackage[left=3cm,right=1.5cm,top=2cm,bottom=3cm]{geometry}
\usepackage[headsepline=0.25pt,footsepline=0.25pt]{scrlayer-scrpage}
\pagestyle{scrheadings}
\svnidlong{$HeadURL: svn://192.168.0.80/Dokumente/Uwe/Main.tex $}
{$LastChangedDate: 2020-07-16 10:42:03 +0200 (Do, 16 Jul 2020) $}
{$LastChangedRevision: 62 $}
{$LastChangedBy: uwe $}
\title{Main Document}
\author{Max Mustermann}
\begin{document}
\tableofcontents
\include{sub-01}
\include{sub-02}
\end{document}
Die Subdokumente sehen jeweils wie folgt aus. Über die *foot und *head Befehle werden die Seitenköpfe und -füße mit den Komponenten aus dem Dateinamen befüllt, \addsec fügt die Dokumente zum Inhaltsverzeichnis hinzu.
%!TeX root=main.tex

\svnidlong
{$HeadURL: svn://192.168.0.42/Dokumente/Uwe/Sub-01.tex $}
{$LastChangedDate: 2020-07-16 10:10:19 +0200 (Do, 16 Jul 2020) $}
{$LastChangedRevision: 60 $}
{$LastChangedBy: uwe $}

\setcounter{page}{1}

\ohead{V\svnfilerev\ vom \svnfileday.\svnfilemonth.\svnfileyear}
\ofoot[\gettwofromcurrfilename-\pagemark]{\gettwofromcurrfilename-\pagemark}
\ifoot[\currfilename]{\currfilename} % inner foot
\ihead[]{} % inner head
\cfoot[]{} % center foot
\chead[]{} % center head


\addsec{\gettwofromcurrfilename~\getonefromcurrfilename}


\blindtext[6] |
%!TeX root=main.tex
\svnidlong
{$HeadURL: svn://192.168.0.42/Dokumente/Uwe/Sub-01.tex $}
{$LastChangedDate: 2020-07-16 10:10:19 +0200 (Do, 16 Jul 2020) $}
{$LastChangedRevision: 60 $}
{$LastChangedBy: uwe $}
\setcounter{page}{1}
\ohead{V\svnfilerev\ vom \svnfileday.\svnfilemonth.\svnfileyear}
\ofoot[\gettwofromcurrfilename-\pagemark]{\gettwofromcurrfilename-\pagemark}
\ifoot[\currfilename]{\currfilename} % inner foot
\ihead[]{} % inner head
\cfoot[]{} % center foot
\chead[]{} % center head
\addsec{\gettwofromcurrfilename~\getonefromcurrfilename}
\blindtext[6]
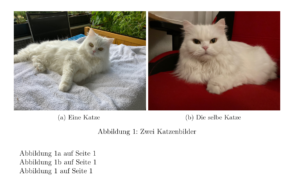
Beispieldokument: Main.pdf
Uwe Ziegenhagen likes LaTeX and Python, sometimes even combined.
Do you like my content and would like to thank me for it? Consider making a small donation to my local fablab, the Dingfabrik Köln. Details on how to donate can be found here Spenden für die Dingfabrik.
More Posts - Website